Sunday, June 23, 2013

Vogue 1347 Chado Ralph Rucci Jacket

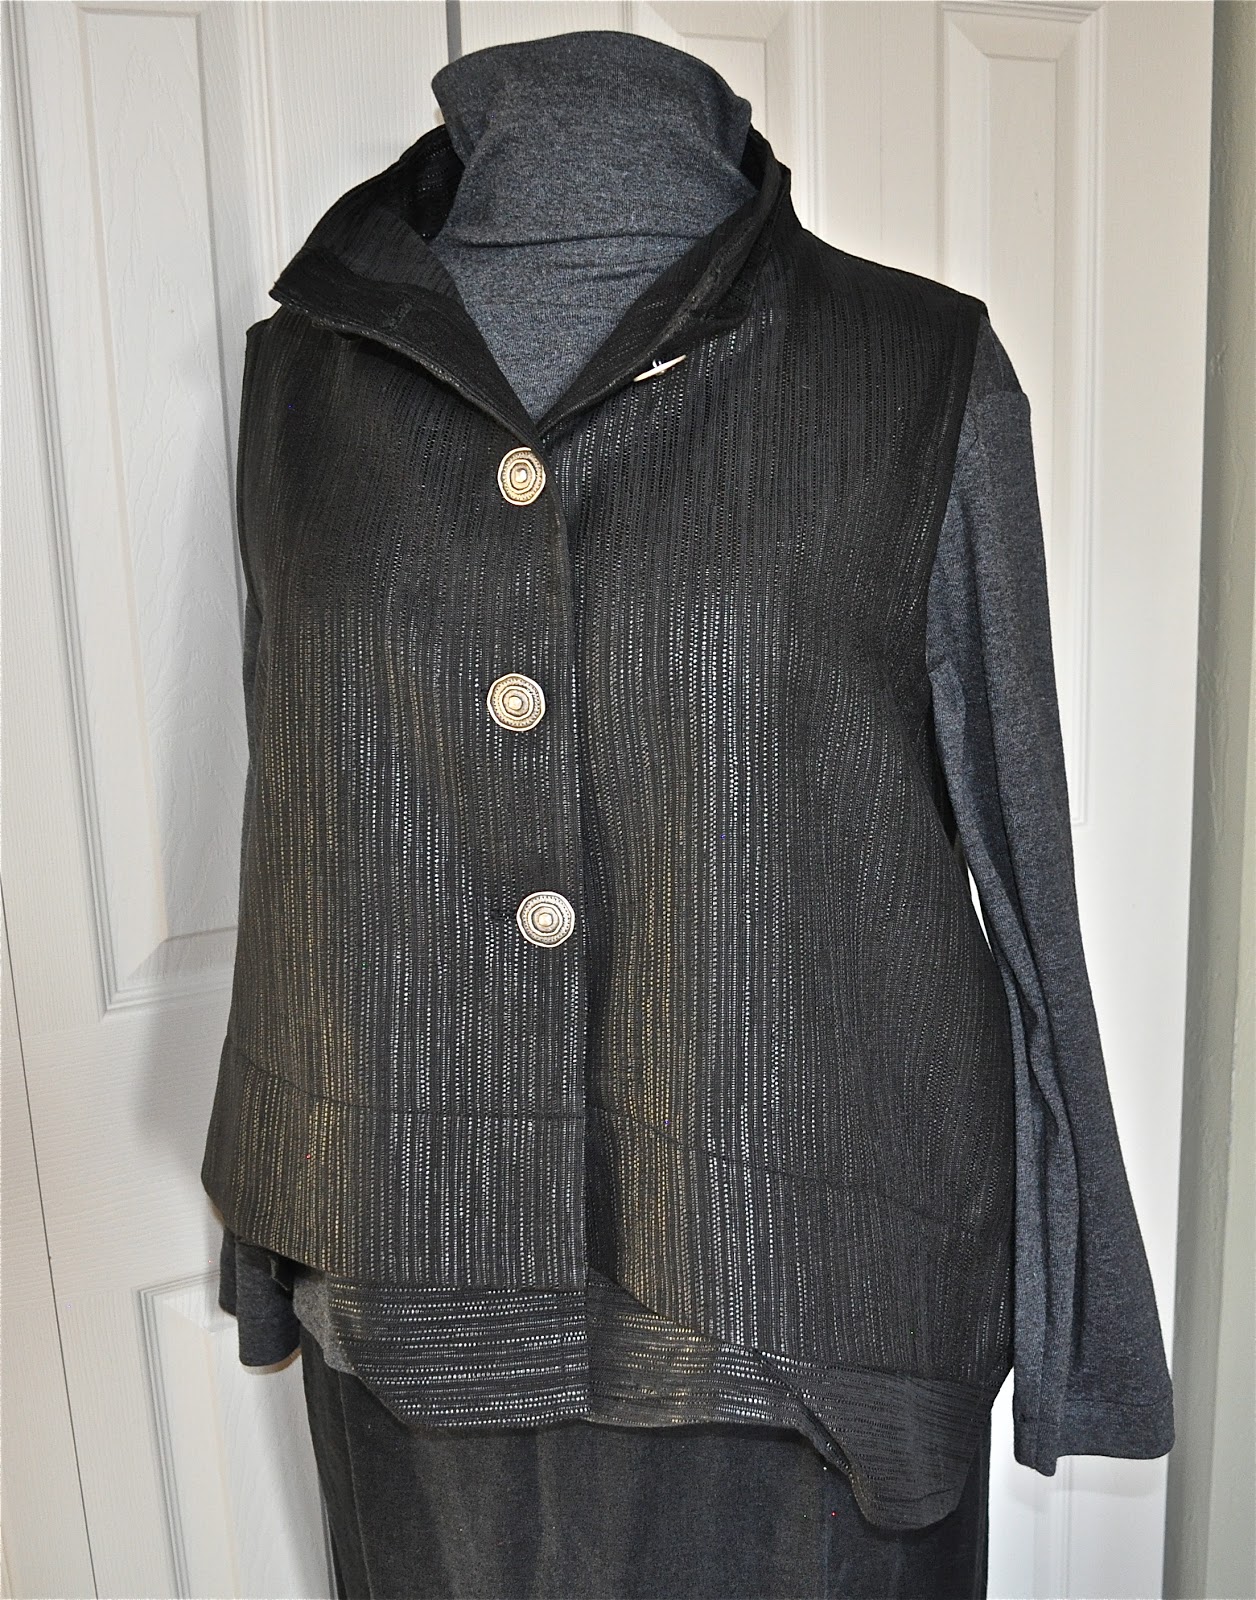
My last project for late winter/early spring--which I actually finished several weeks ago, but am only now getting to blogging about--was the shirt/jacket from Vogue 1347, a design by Chado Ralph Rucci.  I think the Chado RR designs for Vogue Patterns always are very interesting, with fascinating design and construction details, but are not always a garment that I think I would actually wear.  This jacket, however, seemed to be very wearable (with the possible exception of the dangling ties, which in our household will probably be viewed as just more cat toys) and I wanted to give it a try.

For the fabric, I selected this piece that has been in my collection for a number of years, but I could never decide on the "right" project for it.  Since I wanted to see how this pattern would look in a stripe, I thought now was the time to use this fabric.  I couldn't find reference to this particular piece of fabric in my records, but I think it might have been a FabricMart find.  It is a black and silver textured stripe, with a touch of white, in some sort of man-made fiber(s), I'm thinking maybe acetate and lycra.  Lots of lycra.  For a woven fabric, this baby has cross-grain stretch like you wouldn't believe.  For the ties, I chose a random piece of black off the shelves, picking one that had the right shade of black and a dressier feel to it.  Everything was from stash, even the buttons (yay!).


Sadly, I failed to match the stripes going down from the yoke to the lower bodice in the front, but I just didn't have enough fabric to make that happen.  I was able to match the bias pieces of the back yoke to achieve a nice chevron effect.  Although I will pat myself on the back in noting that my bias stripes in the back matched up perfectly, I also observe that a slight misalignment of stripes in the back yoke would be less noticeable on this pattern because that seam is covered by a strip of the solid black.


Hmmm.  The above picture makes it look like the hips are a little too snug, but that is not the case on my body.  There is plenty of ease in this pattern at all areas.  But this picture does point out one of my construction mistakes that I elected to leave as a mistake.  In pretty much the first step of the instructions, you are directed to sew the lower front and back bodice pieces together at the side seams.  I knew from the pattern photo, as well as the pattern pieces themselves and the instructions, that the lower section of the side seams is to be left open for a vent.  But no, I blithely sat down at the machine, sewed and finished the seam from top to bottom, and only remembered about the vent as I was pressing the seam again.  DUH!  Really?  I can't get past the first step of the instructions without making a mistake?  I chalked it up to the hubris that sometimes bites an experienced sewist in the a$$, decided I liked the look as it was and moved on.


Here's a couple of closer looks at the back yoke area.


As I mentioned above, the Vogue CRR patterns always have intriguing design and construction details.  This particular pattern has great design lines, with the yoke/upper sleeve piece, the separate under sleeve and the lower sleeve band, as well as the decorative bands.  As far as construction details, I actually omitted the major one, which is that all of the seams in this garment are supposed to be flat-fell construction.  However, I think I also mentioned above that the fabric I chose has a LOT of lycra.  It's really stretchy on the cross-grain.  The thought of trying to do flat-fell seams on this fabric made me want to tear my hair out before I even tried sewing a seam.  So I intentionally opted out of the flat-fell technique.  Instead, I stitched the seams, finished them on the serger and then top-stitched them flat.  Honestly, with the color and texture of this fabric (and using black thread), the effort of doing a true flat-fell would have been lost--you can barely even see the top-stitching unless you're looking very close.  Here's a picture of the inside yoke area.


I thought that with the multiple pieces involved in the sleeves of this garment, it would be fun to play with a stripe to see what the effect would be.  I think it looks pretty cool, if I do say so myself.  


The front and back yoke/upper sleeve is all one piece (well, one piece for each side which is then seamed together at center back as shown above).  The shaping for the shoulder area is achieved with a dart placed where the shoulder seam would normally be.  The collar is a fairly standard shirt two-piece stand and collar construction, with the stand at center front being squared off instead of curved (much easier to make both sides identical!)


I will say that the solid black I used for the decorative bands became a little stiff by the time they were sewn in a tube, turned and top-stitched onto the body of the garment.  As a result, the bands on the sleeves kind of cause the sleeves to stand out and open in a bit of a bell shape.  In some ways, I don't mind that because it emphasizes the lovely piecing of the sleeve design.  In other ways, it makes this garment kind of "a lotta look."  It certainly won't be one of my every-day pieces to wear.  But it will be really fun to pull out when a dressier look is called for.  But then again, it might be just fine to wear to work open over a nice knit top, with basic black slacks and a great silver necklace.  I'll have to try some more styling options.  All in all, I'm very pleased with how this jacket turned out.  I would love to try another version using a solid color, probably a linen, similar to the look shown on the pattern cover.  I think solid linen would result in a garment that would be very wearable in daily life.


As far as sizing, after looking at the finished garment measurements on the pattern tissues and doing a little flat measuring of my own, I elected to size down two sizes in the upper body/sleeves and one size through the hips from what is recommended for my measurements on the actual size chart on the back of the envelope.  It worked perfectly.  I would also say that this pattern is surprisingly simple to sew.  The only difficulties I see would be if you've never done a two-piece stand collar and the top stitching.  The instructions for the collar were pretty clear and, as I noted, the stand is squared off in the front, so there is no having to match the shape of the curves at each end.  An edge-stitching or blind hem foot is always helpful with achieving even top-stitching, but I chose to fly without a net and just used my regular straight stitch foot (I'm too lazy to change foots unless I really need to.)

If you've always really wanted to sew up a Vogue Chado Ralph Rucci design, but were hesitating because you thought they were too difficult, this pattern would be an excellent one to dip your toes in the water with.

In other sewing, I've finally moved on to sewing for warm weather.  I've pulled fabrics/patterns and even stitched up a few items.  Hopefully I'll have updates soon.


Sunday, May 12, 2013

Three TNT Tops

I recently made up three knit tops over a weekend.  I had pulled the fabrics out and had them sitting on the work table while I admired them and tried to decide what they wanted to be.  One I had purchased several years ago, one purchased last summer and the last purchased just about a month ago.  I love each for its striking and unique look.

I often get on myself for not using and expressing more creativity in my sewing, whether that be by redesigning and changing up how I use my TNT (Tried and True) patterns, or by experimenting more with combining fabrics, or by working more with fabric manipulation/embellishment.  I feel often like I'm copping out or not pushing myself enough in my sewing.  Especially when I read others' blogs and am so impressed with their creativity in what they do.

But then, sometimes, I look at a fabric and just want to let its beauty sing on its own in a simple design that I know will work and I will love wearing.

These photos aren't the best at showing the details of the garments (they kind of just look like blobs of fabric), but they do show the fabrics.  And you've seen other versions of these patterns made by both myself and others in the sewing world.

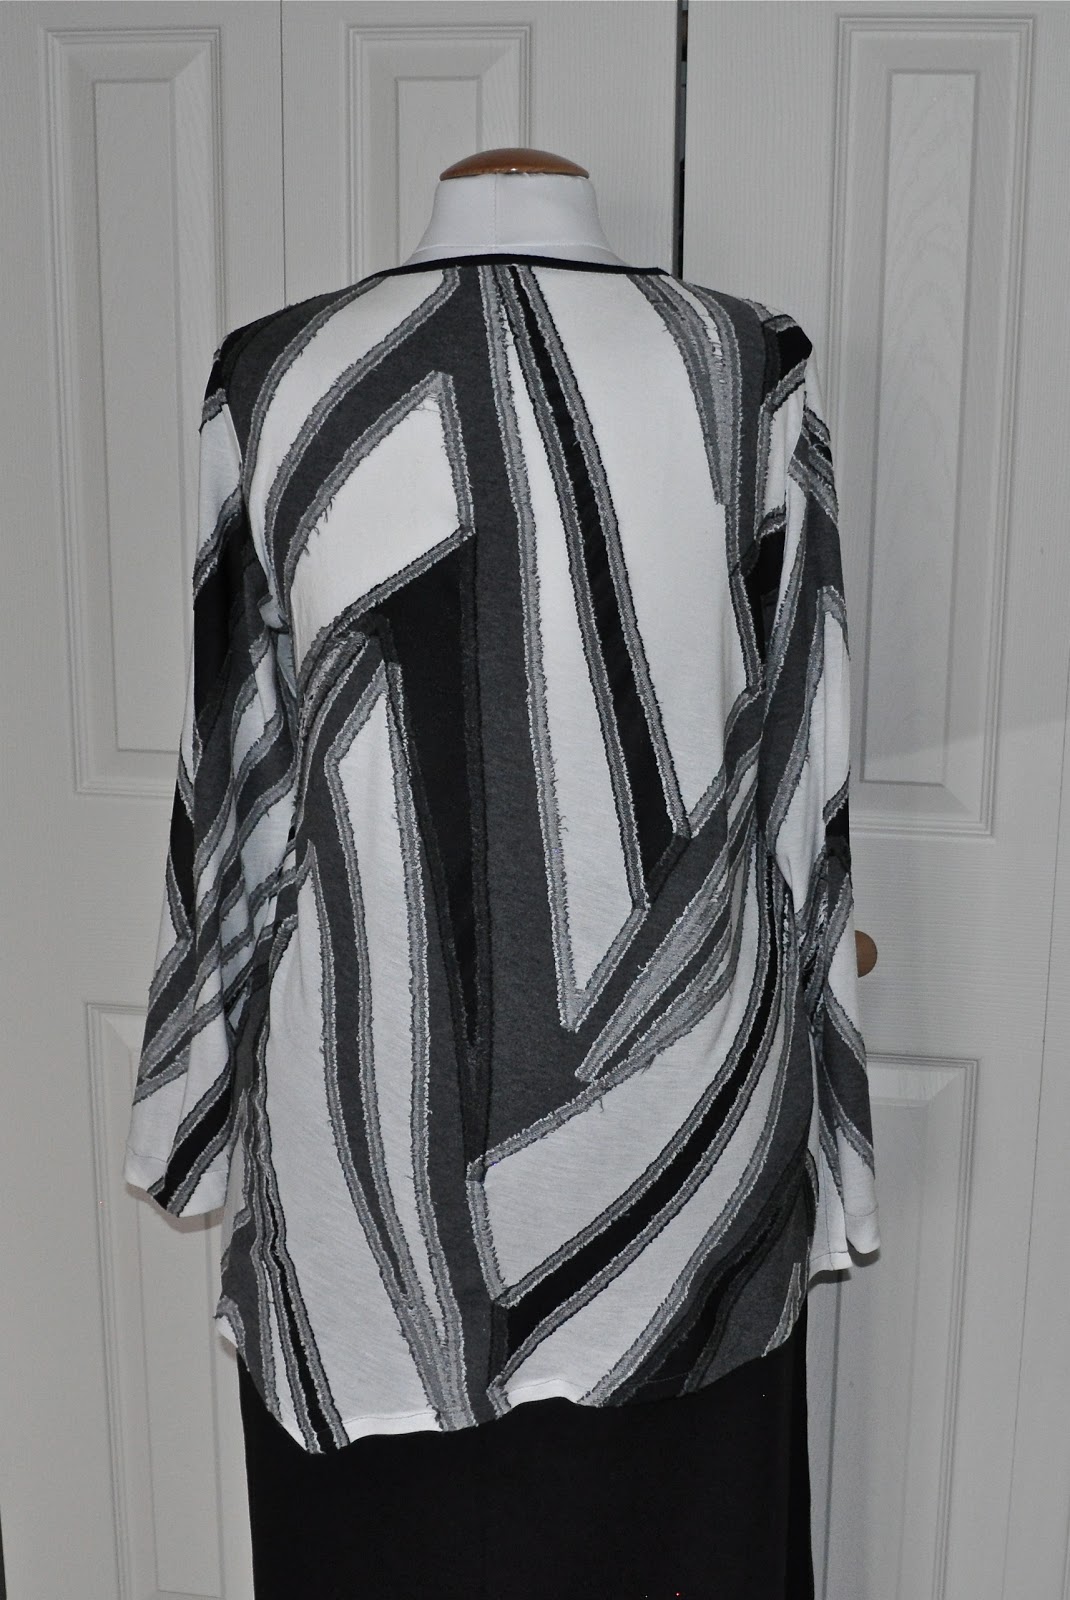
I believe I got this first fabric several years ago from Marcy Tilton.  I'm not positive, because I couldn't find an entry for it in my record book, but I'm pretty sure it was MT.  I used the StyleArc Adele Top pattern for this one because I thought the angles of the pattern went well with the angles of the fabric.


This is a nice lightweight rayon knit that should work well going into early summer, even with long sleeves.  I love the rough raw-edge feel to the lines in the fabric.  (please try to ignore the wobbly-looking hem--it's not that bad in real life)


Next up was a gorgeous rayon/lycra knit that I got from EmmaOneSock last July.  It's kind of a spotty stripe print in black, gray and white.  For the pattern, I used Vogue 8582 (now OOP), the Marcy Tilton designed knit top with the side drape.


I use this pattern a lot because it fits nicely through the shoulders and upper torso, but has an easy loose fit elsewhere that makes it extremely comfortable to wear.  I'm sure I'll be using it again soon with the sleeves shortened for a couple summer tops.


Finally, there was this more recent acquisition--a rayon/lycra knit print from Sawyer Brook.  As soon as I saw this fabric come up on their website, I knew I had to have some.  I just love the African theme of the print and the colors that were used.  I also knew pretty much right away that it wanted to be another Sewing Workshop Liberty top.  (and that one figure's head does not actually land right on my boob when I'm wearing the shirt, it just looks that way on the dress form)


I apologize if you all are getting completely bored with how often I make this pattern, but I just can't resist.  You know when people ask that question:  If you were marooned on a desert island with a sewing machine and all the fabric/notions you could desire, what would be the top 10 patterns you would want to have with you?  Well, the SW Liberty Shirt would be number 1 on my list.  And I'm fairly positive this pattern also will be showing up a couple of times in my summer sewing.


And so I go on, torn between the thought that I should be more creative in using and applying the sewing skills I know I have and the knowledge that sometimes it's good to let the uniqueness of the fabric and patterns speak for themselves.  Where do you fall on this continuum?

Last weekend I went through the majority of my fabric collection, reorganizing and culling some of the (to me) dead weight.  I now have five big black trash bags of fabric in the trunk of the car waiting to go to the thrift shop.  I still have A LOT of fabric, but I feel better about what I have and it's all up off the floor and on the shelving units (yes "units" plural).  I still have to go through the sewing closet before I'm finished, but I am a bit rejuvenated and ready to sew.  Sewing so far this weekend has been a little boring--I made two pair of black pants from my TNT pattern to replace two pair in the closet that have become pretty worn out.  I used a cotton/lycra sateen for one and a 100% linen for the other, both fabrics very nice and found at JoAnn's, surprisingly enough.  I always try to have several pairs of basic black pants in my closet as they are my go to garment for my bottom half.

My other project for this weekend is to finish up the last of my late winter projects.  I'm working on Vogue 1347, the Chado Ralph Rucci shirt/jacket.  It's been sitting on the work table half-completed for two weeks now and I want to get it done.

We've finally had a few sunny and relatively warm days here in my neck of Montana, so I'm finally starting to think about summer sewing.  I've pulled the stack of fabrics I want to work with for summer and I've been thinking about joining the Stitchers' Guild Summer 6-PAC sew-a-long.  Warm weather clothes are not my favorite to sew, so I need all the incentive and cheering on that I can get!

Finally, on my last post, Martha asked about faille.  There are several descriptions of faille at TextileGlossary.com.  Essentially, faille is known by its kind of ribbed texture created by differing weights of the fibers used in the warp and weft of the fabric.  Faille comes in all types of fiber content; I currently have pieces of faille in both silk and cotton, and I have seen it also in both polyester and acetate.  As far as drapiness, in my experience that can vary quite a bit.  I have always washed any piece of faille I've acquired (because I wash virtually everything in my collection before it goes on the shelves, except a few special pieces of wool or silk), and I've had some become very drapey and some not.  The drape of the fabric also can depend on the fiber content and the thickness of the warp/weft fibers used.  The cotton and poly blend faille I used in my skirt clearly had a nice drape to it that lent itself well to the tucks and volume of that pattern.  Other failles I have encountered have a much more stiff hand to them.

I have a large hunk of black cotton faille I got a while back from FabricMart.  I purchased this piece because I needed to make a couple of art garments and I was hoping the fabric would discharge well.  Nicely, upon applying a bleach/water discharge, the fabric became a lovely rust which then moved toward a lighter salmon/pink color.  I shall have to take some photos of the vests I made with this fabric and write up a post on it soon.


Sunday, April 14, 2013

Vogue 1333 Sandra Betzina Skirt

I've been wanting to stitch this skirt up for quite awhile, but couldn't decide what fabric to use.    Mainly because this skirt is a fabric hog in requiring approximately 3 1/2 yards of 60" fabric in the mid to upper size ranges.  (I made a size F, which is roughly equivalent to my measurements on the chart.)  I just didn't have anything really suitable in stash that was that much yardage.  Finally, I pulled this fabric off the shelf that I got from FabricMart about a year ago--there was more than enough yardage and I wanted to see how the skirt worked up in a border print.  The fabric is a dark gray cotton/poly/lycra faille with an embroidered border of flowers in colors ranging from white to pink to fuchsia to burgundy, and vines in green.  Totally NOT my usual in fabric choice (other than it being faille--I love faille).  I'm not usually one to pick floral motifs in my fabrics, but this one just kind of pulled at something in me.  I'm glad I went with the whim, though, because I love this fabric and I love how the skirt turned out.  (this knit top actually matches one of the colors in the flowers, even though it doesn't seem so in the photo)


Kitty had to help with the photo shoot.  Everyone, meet Ash.  She is 8 months old and is learning how to be a sewing room kitty.  Some days are better than others.

Side view:


This is pattern basically is a simple elastic waist skirt with an overlay piece that has sewn tucks in three places.  I really like how the tucks/pleats cause the side drape to fall in nice folds and give interest to the skirt.  Of course, the overall volume of the skirt will look different depending on the fabric you choose.  You want something with a nice drape; anything with a stiffer hand might tend to look like you are wearing a one-sided pannier.  My hips and behind don't need that kind of help.  Actually, the tucks lay very nicely along the back without adding too much extra bulk.

The back:


As I noted above, I wanted to see how this pattern made up in a border print.  I think the answer is "fabulous!"  Note that the pattern pieces are not a straight line across the bottom where the border is placed; they both curve a bit.  This worked alright in my fabric because I had a couple of inches of plain fabric at the selvedge to work with in placing the hem.  Some border prints may be a little trickier for placement.


Other than the layout and cutting (this pattern essentially is just two really big pattern pieces cut single layer, so you need a fairly good sized cutting space and no help from kitty), this skirt is very fast and easy to stitch together.  I think this would make a great skirt for summer in a lighter weight and color of fabric, and I'm considering options in the fabric collection for a summer version.


Sunday, March 31, 2013

Butterick 5891 Katherine Tilton Top and Jacket

Just a warning--this post has quite a few pictures.

Butterick Patterns recently released a couple of patterns designed by Katherine Tilton, sister of Marcy Tilton.  (I'm still a bit curious about why she moved from Vogue to Butterick--anyone have any ideas?)  One pattern that really hit my "need to make it now" button was B5891, a very interesting pattern for a top/vest and a jacket.  I purchased it right away (well, as soon as the Butterick website put them on sale).


I decided to try the vest first.  The pattern actually describes this views A/B as a "top," but I call it a vest because I would only wear it over another garment with sleeves.  My upper arms do not make public appearances any more.


 I chose an odd fabric I had sitting on the shelves that I got from Vogue Fabrics about three years ago.  It was labeled as a poly/rayon blend striped jacquard.  I thought it was kind of weird and wasn't sure what to do with it, so it sat around for awhile.  I figured it would be good to use for testing this pattern, since I wouldn't mind if it became a wadder.


This is a very interesting pattern.  It is rather cumbersome to cut out because there are 15 pattern pieces and they are almost all cut with the fabric single layer.  I think it is essential to keep the pattern pieces attached to the cut fabric until the last possible moment and to transfer all the markings to the fabric.  It is very easy to get the pieces mixed up or get them turned around.  It would be a nightmare if your fabric looked the same on both front and back.  Luckily, my fabric had some sort of interfacing pre-fused to it, so it was quite clear which was the wrong side.  This did become an issue at one point, however, because the inside of the double collar shows the wrong side of the inner collar when you wear the neck unbuttoned.  As a result, I chose to self-line the inner collar so it would look nicer when open.


Here's a view with the collar buttoned up


And the back.  I tried to play with the texture of the fabric in the peplum pieces.


The front peplum pieces have tucks sewn in, which adds an interesting contrast to the otherwise fairly straight structure of the garment.


Overall, I'm basically happy with the resulting vest.  My fabric is probably a little to stiff for this pattern, so it may not be the most flattering look on me.  The vest is narrow through the shoulders, but increases greatly in width at the hipline--my stiffer fabric kind of accentuates that.  Also, if I ever make it again, I will cut the armscyes a little lower.  They are cut high under the armpit, which is a good feature if you are going to wear it alone as a top (no bra flashing when you raise your arms), but makes it a little tight with a shirt on underneath.  

While this is not a difficult garment to stitch together, I must say that the pattern directions were a little vague in some areas and also could have included a little more info on finishing details for a better resulting garment.  A beginning level sewist might have some difficulties figuring out what the instructions mean for you to do in certain places, but a little playing with the pieces reveals how it all comes together.

Shortly after finishing the vest, I just had to make the jacket as well.  For this I chose a raw silk tweed in natural, black and white.  I previously had washed the fabric, so it was a little more drapey than perhaps this view needs.  The collar is a really neat feature and I'm not sure it comes across as nice as it could with another fabric with more body to it.  However, I must say, I LOVE this jacket.  The collar is really fun to play with, and can be draped in different ways.  There is a small button hidden inside the left right collar that will hold the right left side of the collar inside, like here:


Or, you can leave that unbuttoned for a completely different look:


As I was rather convinced that this wasn't going to turn out well, I didn't bother to change the serger thread to a color that would blend into the fabric, so you can see the serging on the collar edges as it drapes.  When I decided I really like this jacket, I was kind of pissed at myself for being lazy.  But, actually, the more I look at it, the more I kind of like the contrast of the black serging.  The nature of the tweed is such that it hides some of the design features, such as the front shoulder princess seams, so the bit of contrast seems to add something to me.

Here's the back.  Rather simple, but it really hangs nicely.


It also has side seam pockets.


I am really very happy with this jacket.  It's a fun look, adaptable to lots of different fabrics for different looks.  Furthermore, this is much simpler and definitely quicker to put together than the top/vest view of the pattern.  I see at least one (maybe two) more of these in my future!


Monday, March 4, 2013

Vogue 8499 Skirt Version 2

Although it has taken me forever to write up a post about it, I made a second version of the Vogue 8499 Marcy Tilton skirt in early January.  This time I used a  linen/cotton blend fabric in black with cream dots woven in to create a striped effect (acquired from EmmaOneSock).  I love this second version even more than the first!  (The top is another StyleArc Debra Zebra--it fits better on me than it looks on the dressform)


The dots/stripes were woven across the grain of the fabric, so I cut the main pieces of the skirt on the cross grain for vertical stripes and then cut the pockets with the grain for a little contrast and interest.


For the pocket closures, I used plain black zippers with silver metallic teeth that I found at the local JoAnn's and added some simple silver zipper pulls that I had in stash.  I again made a shallower sub-pocket inside one of the larger outer pockets to be more accessible for my work keys and such, but again forgot to take a photo of that part.


This skirt is so fun--both to sew and to wear.  Although it has a pretty distinctive look to it, I think there might be room for at least one more in my closet if the right fabric comes along or pops off the shelves of the fabric collection.


While searching out the photos of this skirt, I also came across photos of one of my last projects in 2012.  I finally got around to making up the E-Shrug, a downloaded pattern from The SewingWorkshop.  I made the lengthened version with long sleeves for a nice sweatery waterfall cardigan.  The fabric is another colorway of the poly/cotton sweater knit from FabricMart that I used to make Vogue 8854 last fall.


I did get some time in the sewing room this last weekend--hopefully I can get some photos taken in the next day or so to post.


Sunday, January 6, 2013

Vogue 8499 Skirt and StyleArc Debra Zebra Top

Well, I seem to be getting a slow start to the New Year.  I just can't decide what I want to work on and where I want to focus.  Also, I have several projects I completed during the last couple of months of 2012 which I still want to blog about, but haven't gotten to.  Here's one.

I've owned a copy of Vogue 8499 since it was issued (the copyright year on the envelope is 2008).  This is a skirt and pant pattern designed by Marcy Tilton.


I originally purchased the pattern because I loved the lines of the skirt.  I was not so thrilled with the pants at the time.  True to my nature, I tossed the pattern on the pile of other purchased-but-never-made-up patterns and allowed it to languish for several years.  Then I kept seeing other sewists making up fabulous versions of the pants and I wanted to jump on the bandwagon of making these "cute with an edge" pants.  After two failed attempts, I had to admit that the style of these pants just do not mesh with my personal body structure, no matter how many alterations/adaptations I made.  But I kept thinking that I still wanted to try the skirt.  So I put the pattern back onto the pile of oblivion.

Then earlier this fall I purchased a fabric from Marcy Tilton that I thought wanted to be a skirt. Rummaging through various patterns options, I came across Vogue 8499 and thought "aha!" finally the perfect opportunity to try this pattern.  Of course, I didn't want to cut my lovely MT fabric without testing the pattern first, so I pulled out a piece I had acquired last summer at JoAnn's.  The fabric is a linen/rayon blend in grey with black circle/swirls printed on it.  My response to the pattern test was "Oh my gosh, what took me so long!!??"  I love this skirt!  It is very comfortable and is so fun to wear!


Even though I tend to wear my skirts long in length, I did shorten this pattern about 1.25 inches (but I have short legs).  If you haven't made this pattern before, be aware that, as a result of the skirt design and technique for  stitching the skirt panels together, the hems of each piece (center front, 2 side fronts and the back) are finished prior to stitching the lengthwise seams together.  Thus, you must determine your preferred finished skirt length at the outset of the process--you cannot leave that decision to the last step of your sewing.  I shortened the pattern pieces at a point between the top of the pockets and the waist to avoid messing with the pocket pieces.  I also omitted the recommended zipper closure at the back waist and used just an elastic waistband.  I added a slight amount to each side of the main body pieces from about the top of the pockets up to the waist to make sure there was enough width to pull the skirt up over my hips.  It worked well.


I didn't have any appropriate zippers in stash to finish the tops of the pockets in the manner recommended by the pattern (and I was not leaving the house that weekend just to buy notions for a test garment!), so I added a fold over facing (with interfacing for support) to the top of the pocket pieces and made a buttonhole.  I actually really like this closure option.  I also added a shorter "sub pocket" inside one of the outer pockets that is only about 4 inches deep so that I can carry things like my keys at work without digging all the way to the floor each time I want to use them.  I forgot to take a photo of that.


In the photos, I have this skirt paired with a StyleArc Debra Zebra Top in a dark grey rayon/lycra knit.  This funnel-neck top is wonderful both standing on its own as a top and as a layering piece under other items.  I have made several of these now in different basic colors and I'm pretty sure I will be making more.  Another winner by StyleArc!  If I recall correctly, the only alteration I made to this top pattern was my standard adding width to the sleeve for my big upper arms.


I have another V8499 skirt in progress as I am writing this post.  In the end, I decided to hold off on using my MT fabric that I originally had in mind for this project because I thought it might be a little too lightweight.  I need to ponder it more.  So I pulled a different piece from the fabric shelves.  I'm about halfway through the sewing process and am at that point where I'm wondering just exactly where my brain was when I thought this fabric would be fabulous in this skirt.  But I'm pushing through to get to the "oh yes, I was right about this pairing" stage.  Hopefully I find it.